
You like the good old sound from the 80s? Well, this time we are bringing your old game consoles to the TV HDMI port 🙂 Retropie can emulate EVERY single game console, from the Atari 2600 up to the Nintendo 64 and Sega Dreamcast.
Requirements:
- Raspberry Pi 4 – 4GB
- USB C Power adapter
- Micro HDMI to HDMI cable
- Used Micro SD card (temporary use, in case you opt for the recommended USB boot / SSD setup)
- SSD storage (500GB recommended)
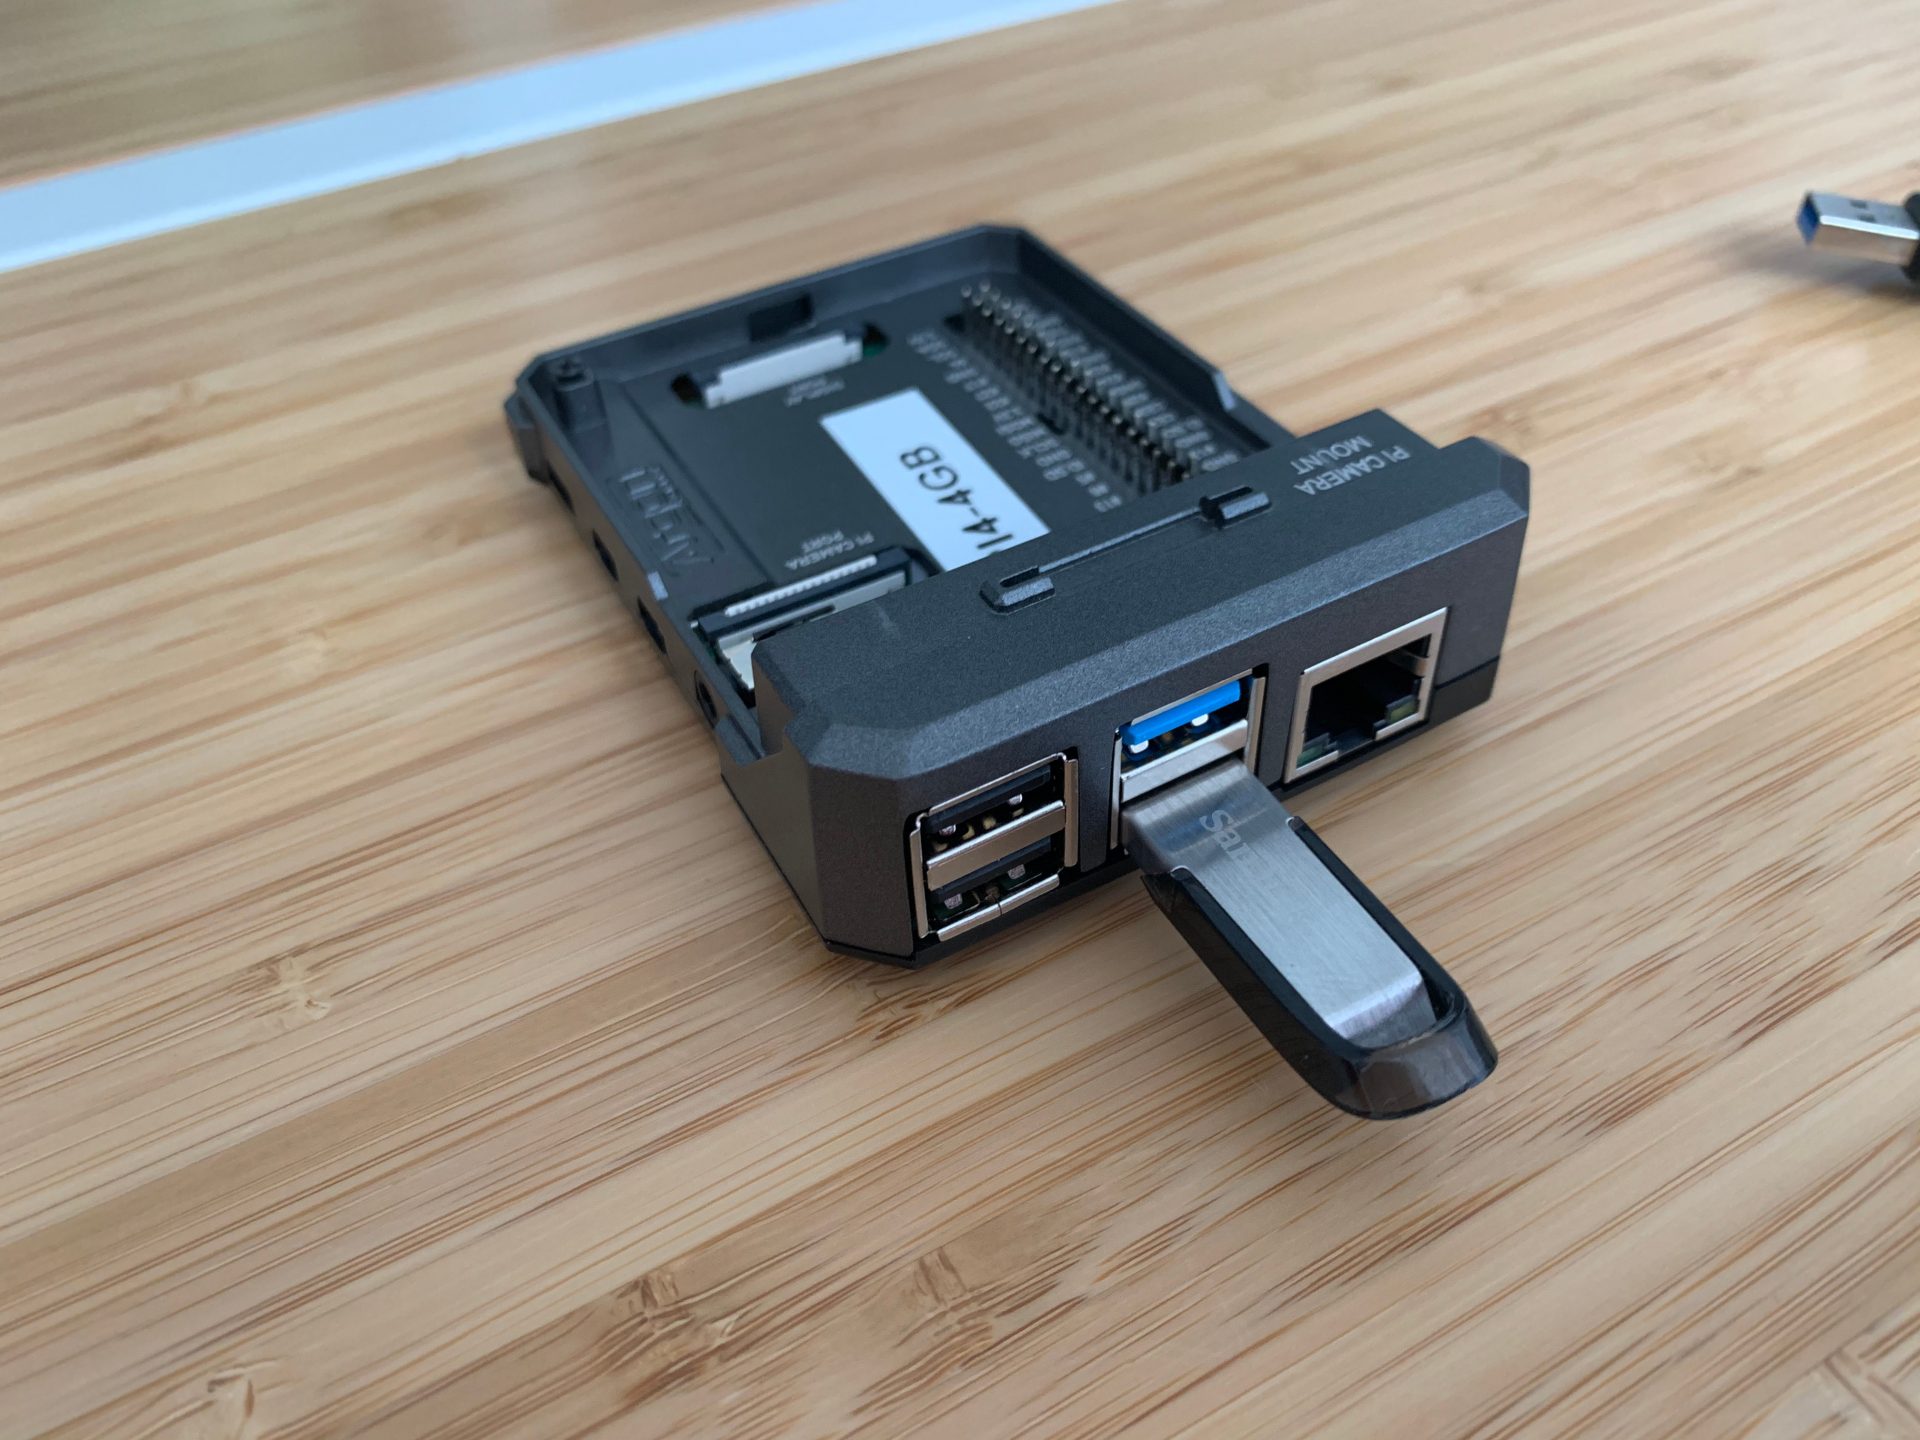
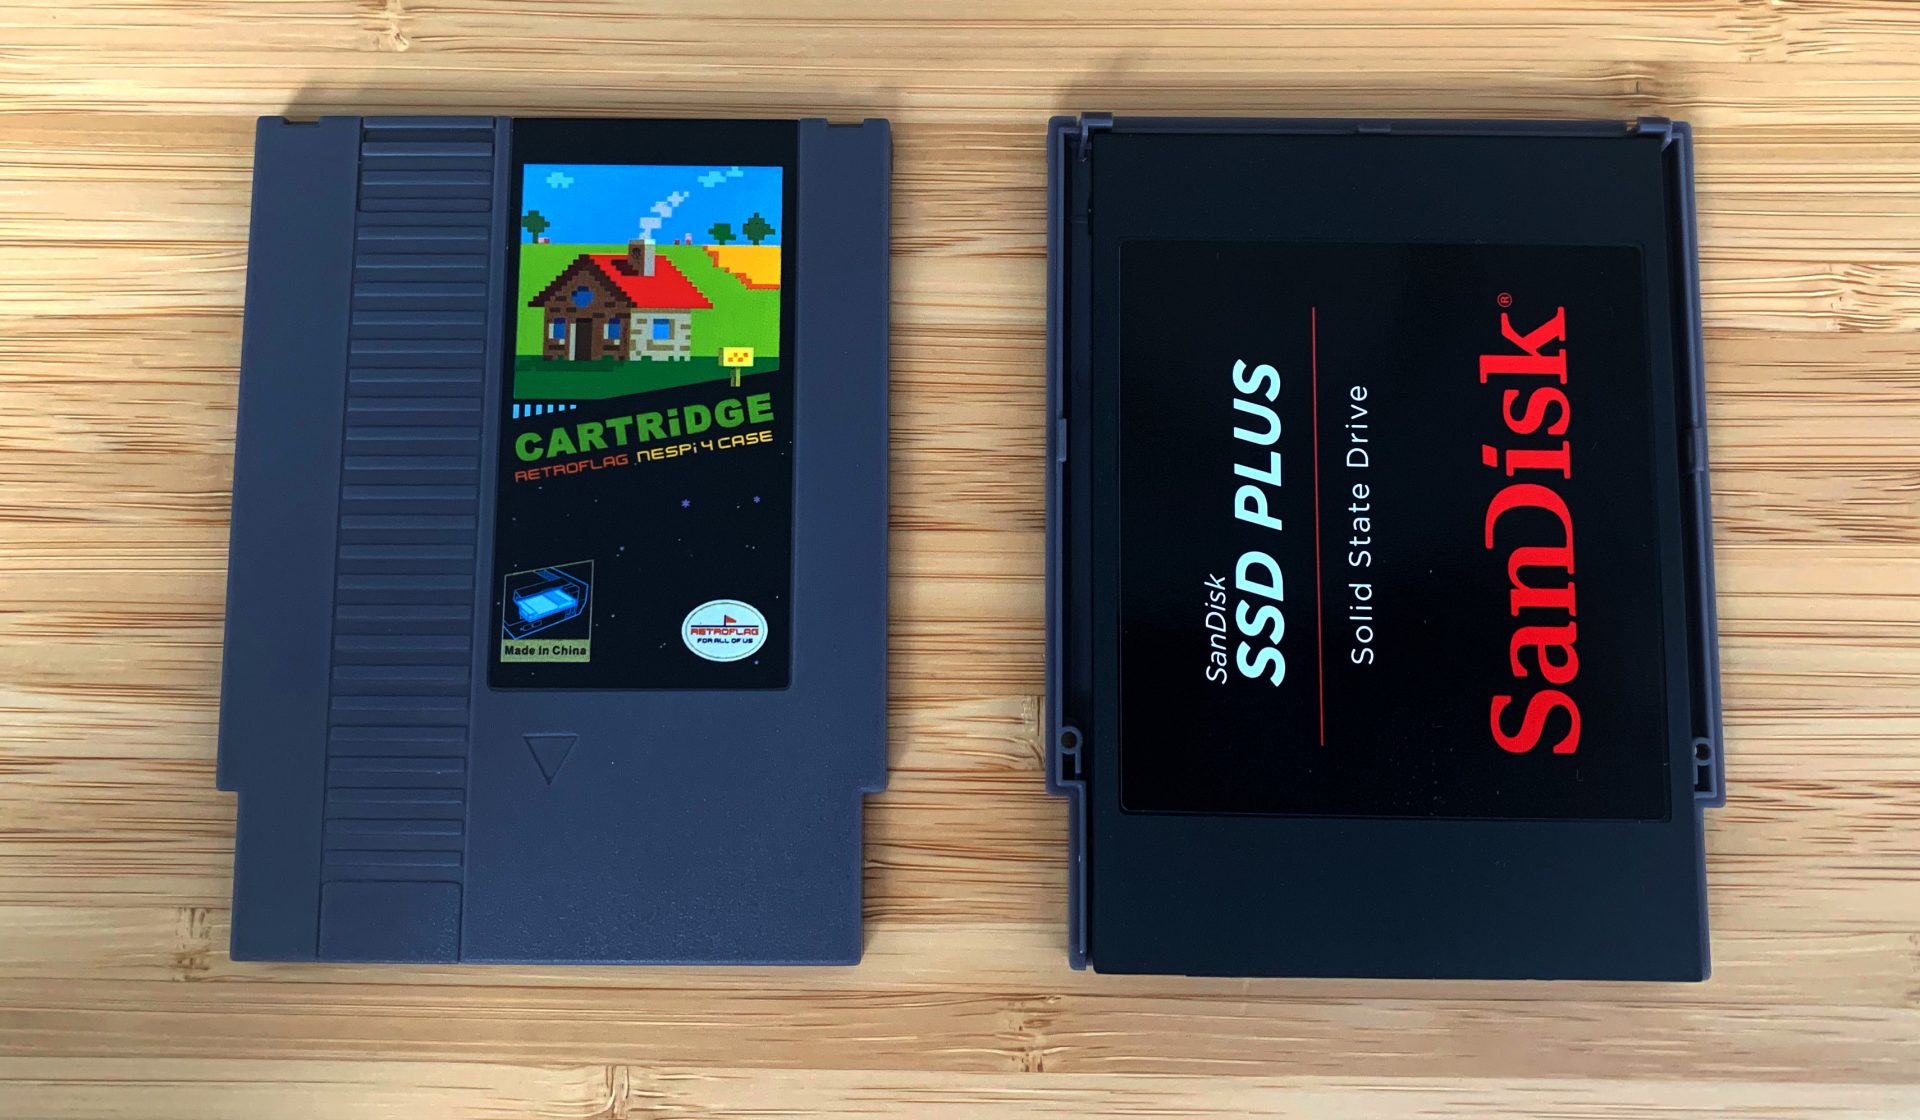
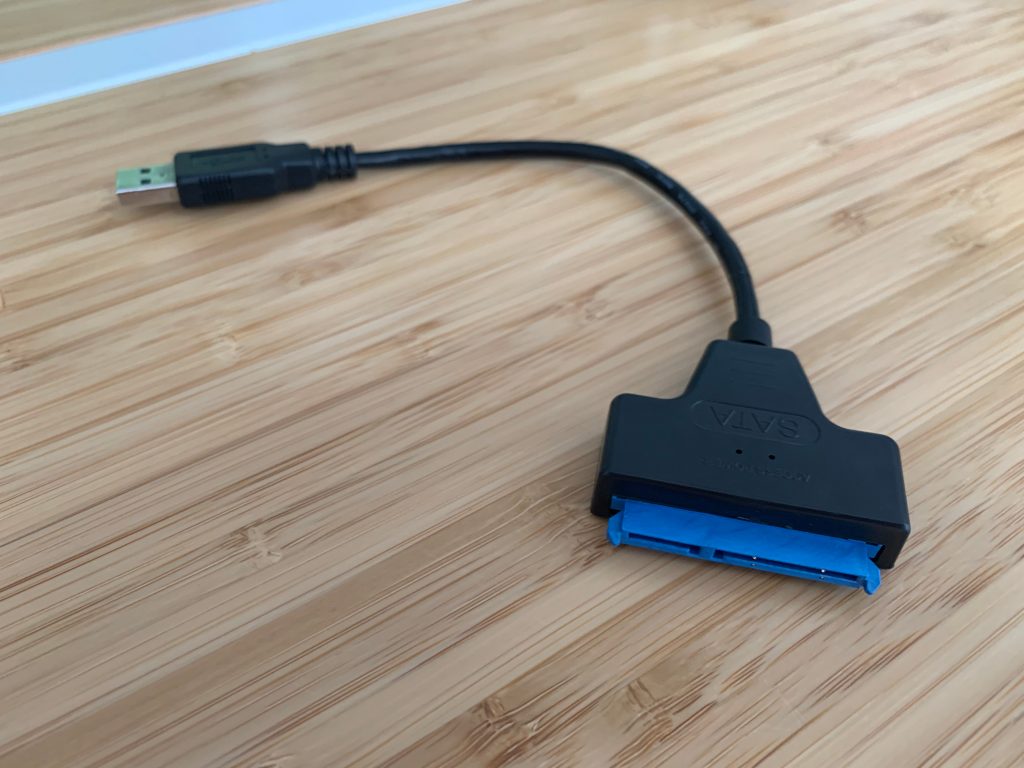
- USB 3.0 to SATA adapter (not required in case you opt for the NESPI 4 Case)
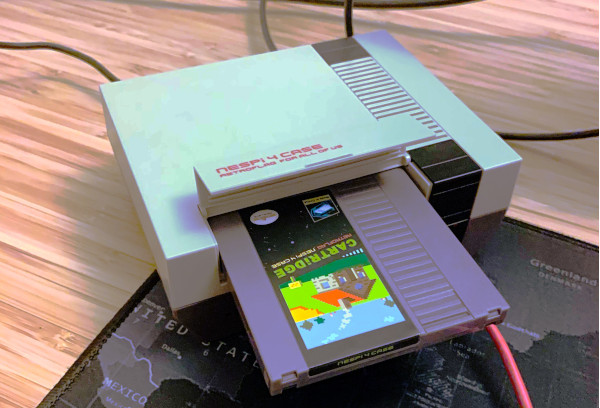
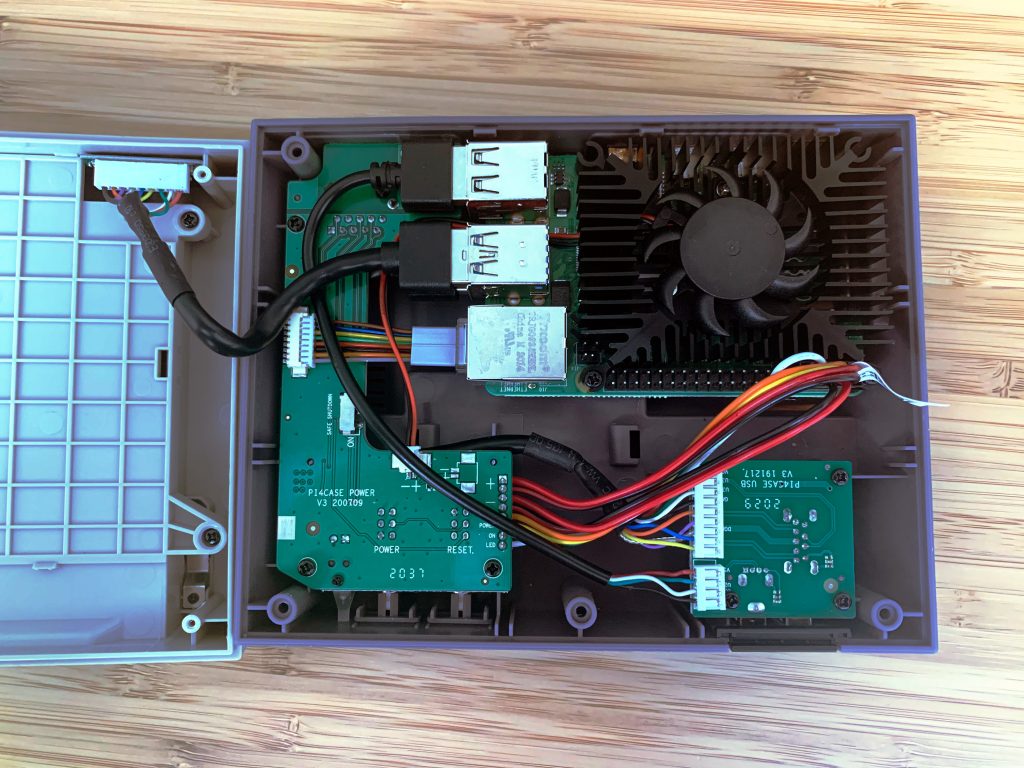
- A Raspberry Pi case with active cooling (I have used the NESPi 4 Case in my example)
- A compatible gamepad (see Retropie wiki for a list of compatible hardware)
In our tutorial, we will explain how to:
- boot you Raspberry Pi from your USB 3.0 port
- install Retropie on your SSD Drive
- do a basic setup of Retropie
- move your ROMs (games) to the Raspberry Pi with FileZilla
IMG_3240
IMG_3242
IMG_3246
retropie-welcome-sceen
IMG_3238-1
IMG_3239

IMG_3232

IMG_3231-2
IMG_2922_small
Step 1 – Setup USB boot on your Raspberry PI
The goal here is to boot your device directly from the SSD drive, via the USB3.0 to SATA adapter. This will significantly improve the performance and the reliability of the device. In addition, the cost/GB ratio is likely to be more affordable on a SSD drive. We will be flashing the Raspberry PI OS on the micro-SD card, so that we can make changes to the firmware via a “user-friendly”interface” If you are not familiar with the Raspberry PI OS setup of your Raspberry PI , please start by reading the instructions from the PI foundation.

Once you have flashed the PI OS on your micro-SD card, connect your Raspberry PI and boot it up. If you have a WiFi connection, follow the welcome instructions to set things up. No need to setup too many details here, since the only reason to start Raspberry PI is too enable the USB boot mode and prepare your SSD. Go to your favorite terminal and type in the below:
sudo apt install
sudo apt full-upgrade
sudo rpi-update
This will update your repositories and upgrade your OS and firmware:
Once done, reboot the Raspberry and go back to your terminal. It’s now time to install the latest bootloader (the program managing the start of your Raspberry). Open a terminal again and type in:
sudo rpi-eeprom-update -d -aReboot again.
Now you need to change the boot options for the loader. You can do this via the simple but efficient raspi-config menu. Launch the menu via the terminal. Type in:
sudo raspi-configCongratulations! there is now a good old fashioned menu to help you out… From the graphical interface, select Boot Options (#3) and then select Boot Rom Version (#B5). Here, you want to tell your Rasberry to use the latest version of the bootloader, which you have just installed. Select Latest (#E1) and press <OK>. A message will pop-up to check if you want to reset those settings to default. Select <No> and press enter. At the boot option menu, select now Boot Order (#B4) and select USB Boot (#B1). As you can read, the Raspberry will now look for a bootable system on the USB ports if there is nothing in the micro-SD slot. Select Finish and Reboot your PI.
Step 2 – Install Retropie on your SSD

From your up-and-running Raspberry Pi , download the Retropie image. The image is compressed and you need to uncompress it before you can flash it.
In order to do so, open the file manager, go in your Downloads folder. You should be able to see the downloaded image there. Right click in the folder and select open in terminal. Just before pressing enter on the below command, press tab to activate the auto-completion function from the terminal and make sure that the file name is correct.
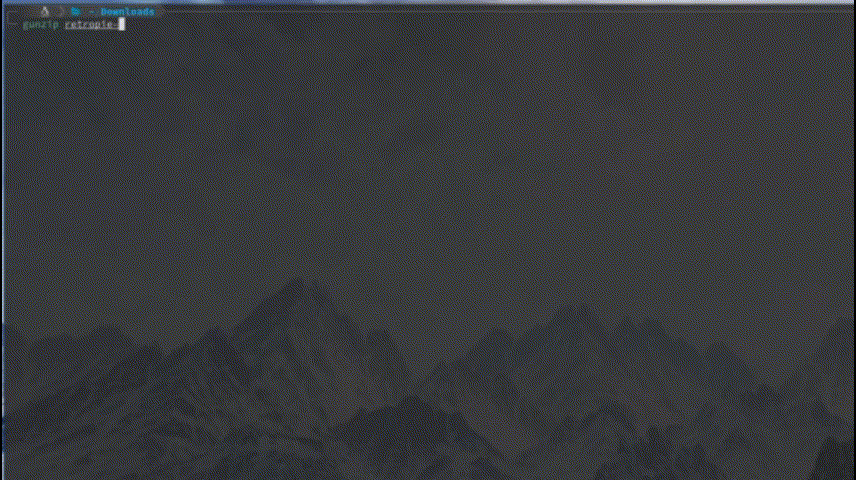
gunzip retropie-Gunzip has now extracted your file and has placed it in the Downloads folder. The name is likely the same, but the extension has now changed from .img.gz to .img. The .img file is ready to be burned on your SSD.
You can use the Raspberry PI imager to install the image on your SSD. if the Raspberry Pi Imager is not yet installed on your device, you can download it via the terminal:
sudo apt install rpi-imagerConnect your SSD drive to the Raspberry with the USB 3.0 to SATA adapter and launch the Raspberry Pi Imager. Select the OS manually (the .img file in your Downloads folder), select your SD card (your connected SSD drive) and click <write>.
Get a oolong tea or a coffee and wait for the image to be installed.
Step 3 – basic Retropie configuration
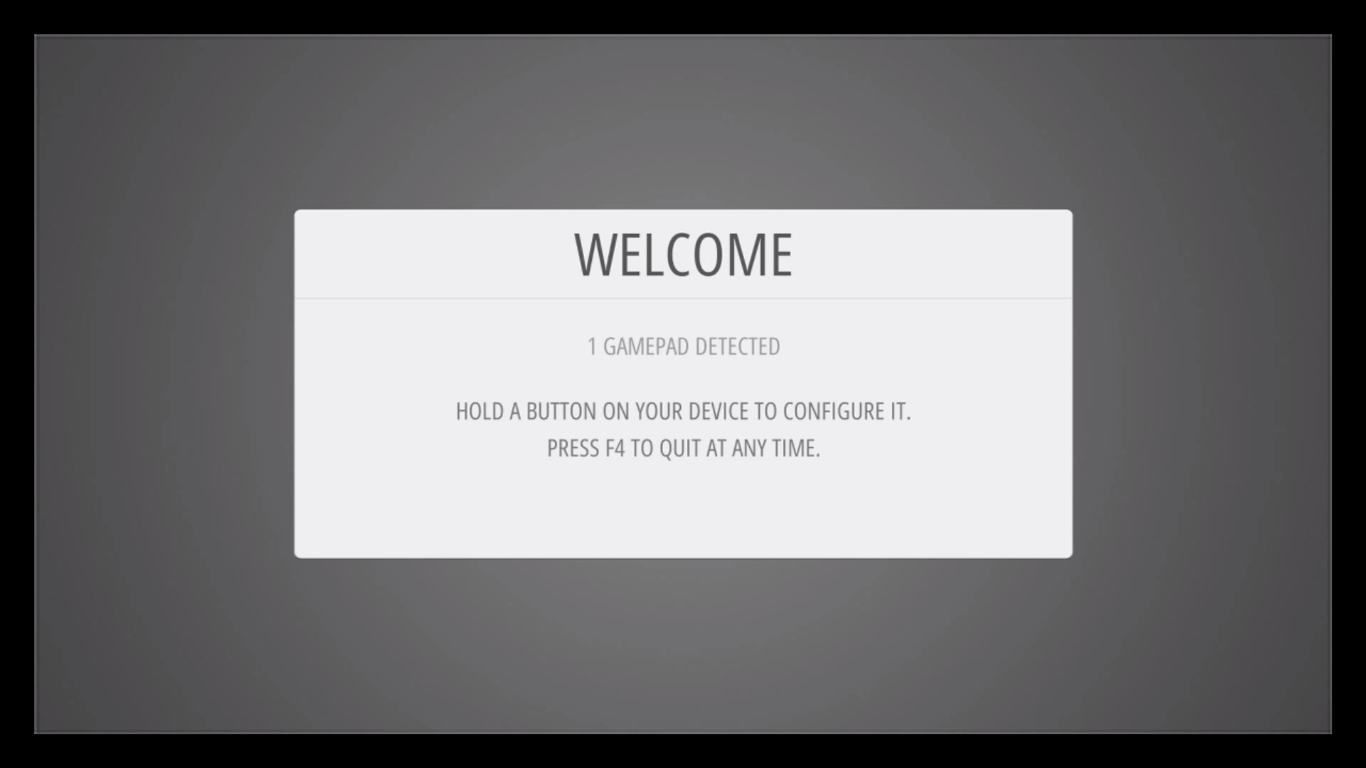
Remove your micro-SD card from the Raspberry PI and connect your newly flashed SSD/USB key to a USB 3.0 port (bue one). Connect your Gamepad to one of the remaining USB port. If you have the NESPI4 Case, simply insert the SSD in the NES cartridge slot and connect your gamepad to any of the USB slot at the front of the case. Boot the device up and after a few seconds, you should finally be welcomed by Retropie…
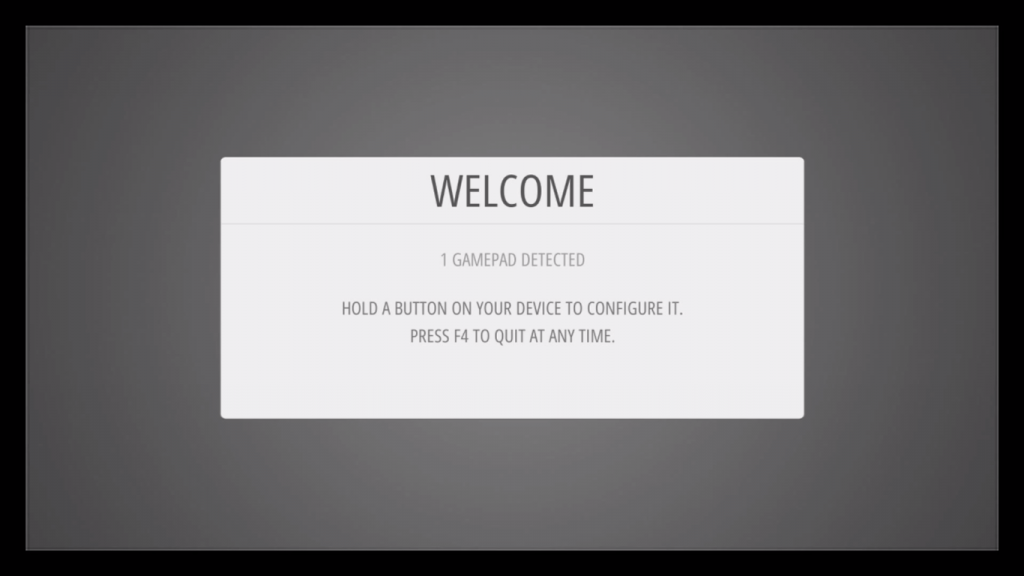
Follow the instructions for quick configuration. In addition, you may want to connect the device to your home Wifi. In order to do so please follow the Retropie guide.
OK! Your Raspberry PI is now booting with Retropie, your device is setup and your Gamepad is connected… all you need is games now!
Step 4 – Upload ROMs with FileZilla
Before we start here, it is important to say that right now, your system is up and running and you can import your favorite ROMS (or games) by connecting your SSD or USB Key to your main computer and copy the ROMs in the appropriate folders. The following is therefore optional.
One easier way to upload the ROMs to Retropie is to use a SFTP-SSH client, such as FileZilla. This way, you can seemingly upload ROMs when your system is on, using the WiFi or cable connection and without disconnecting your SSD drive or USB key. In order to do so, you need to know the IP address of your Retropie. There are many ways of doing it: via your router, or via your computer. If you do not know how to do this, please follow the instructions here.
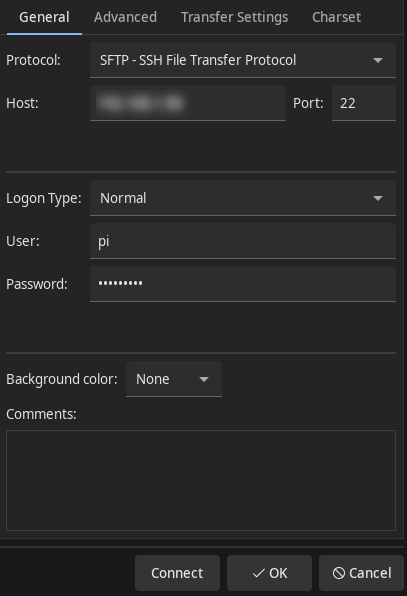
Once you have the local IP address of your Retropie, download a SFTP client, such as Filezilla. Via the main menu, click on <File> and <Site Manager>. Click on <New Site> and provide the below information.
- Host: (this will be your local IP address): 192.xxx.x.xx
- Port: SSH is using port 22
- User (defaut): pi
- password (default): raspberry
Make sure that you change the default User and Password from the Retropie menu at a later stage, or you may just just make your network vulnerable to intruders.
Now your connection should be on. Your computer folders are showing up on the left side, while your Retropie folders are showing up on the right…
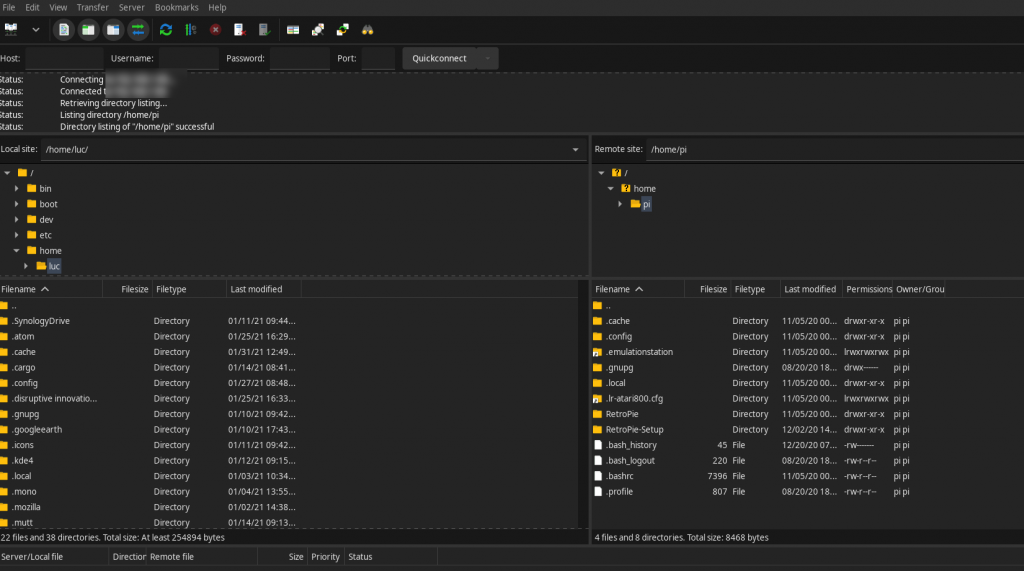
Looking at the right side of the FileZilla window, go into the <RetroPie> folder and then the <roms> folder. Here you should see a list of the systems supported out of the box. Follow the RetroPie instructions for each of the emulators you are planning to use and copy the ROMs from your computer to their appropriate folder on RetroPie. I would like to say here that the RetroPie documentation is a fantastic source of knowledge and prior installing ROMs brutally, you should first check the installing recommendations from RetroPie, especially for the MAME (arcade) games.
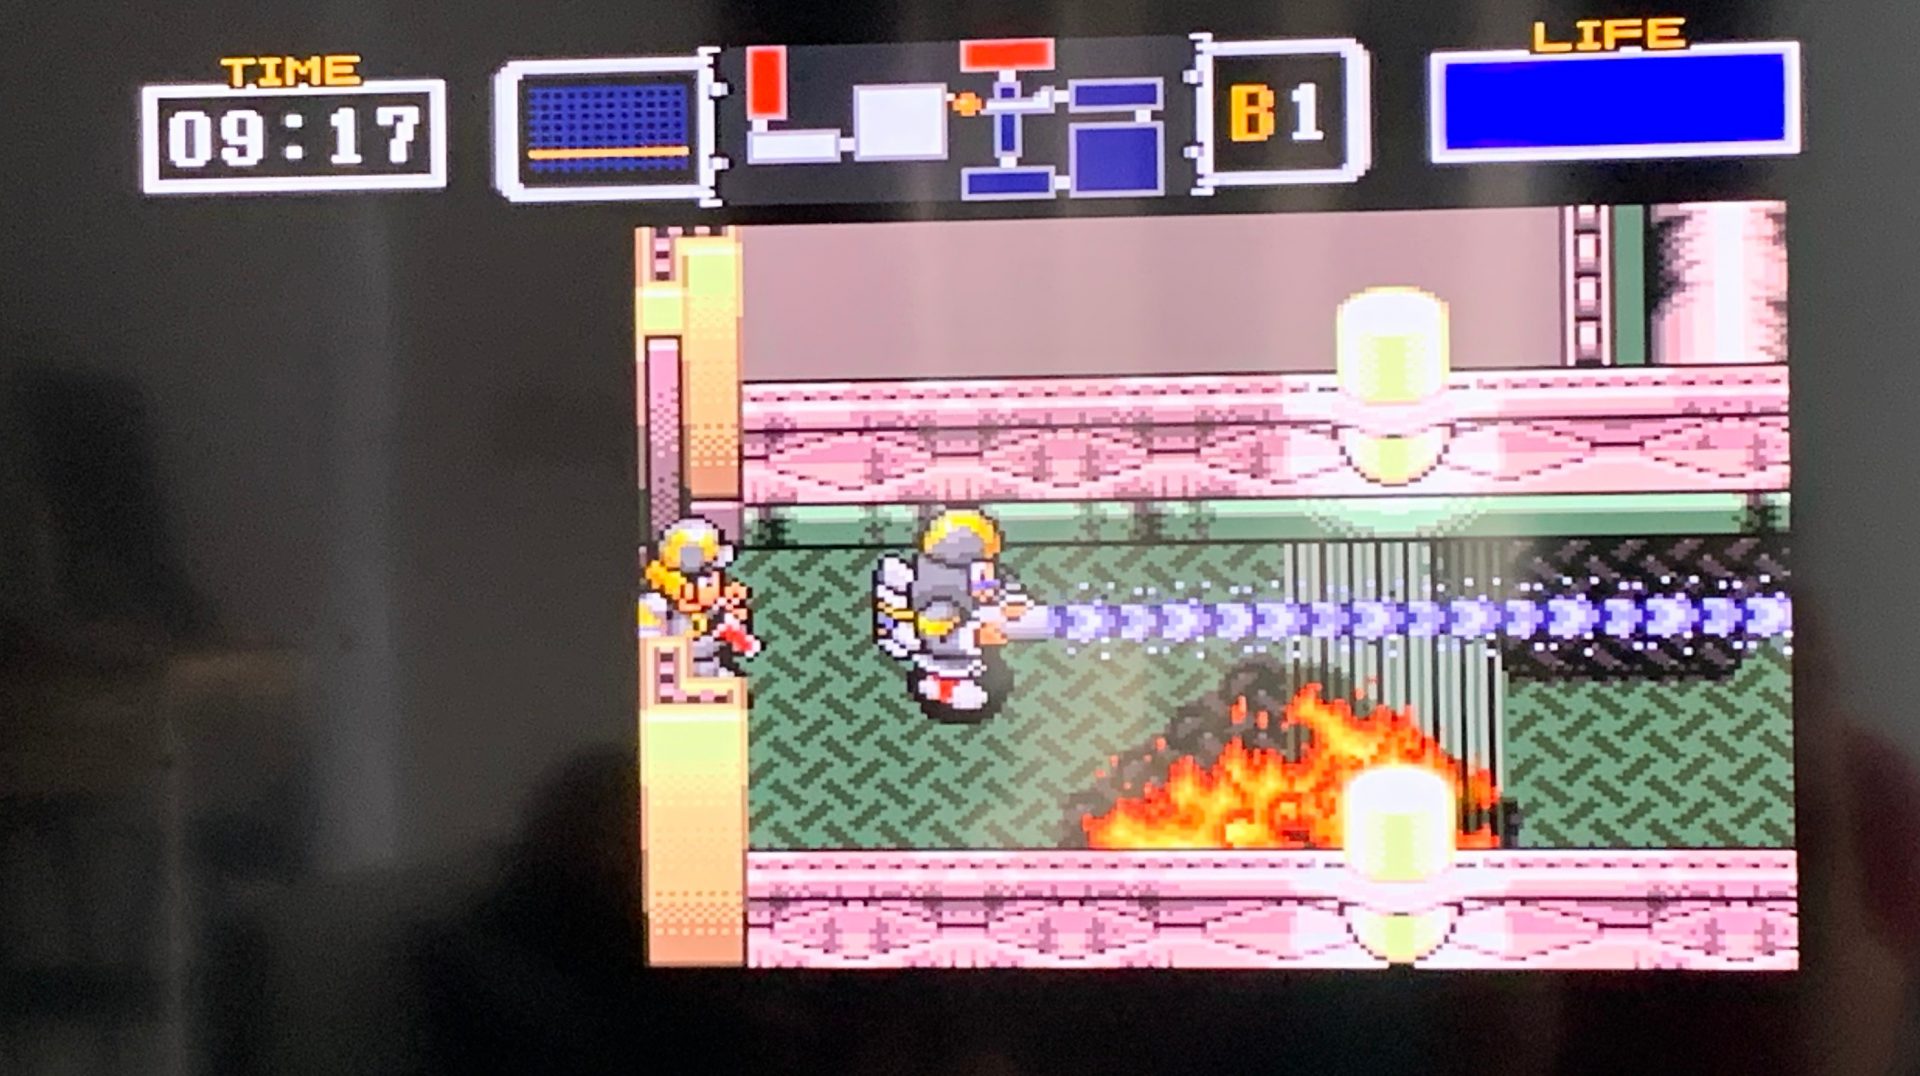
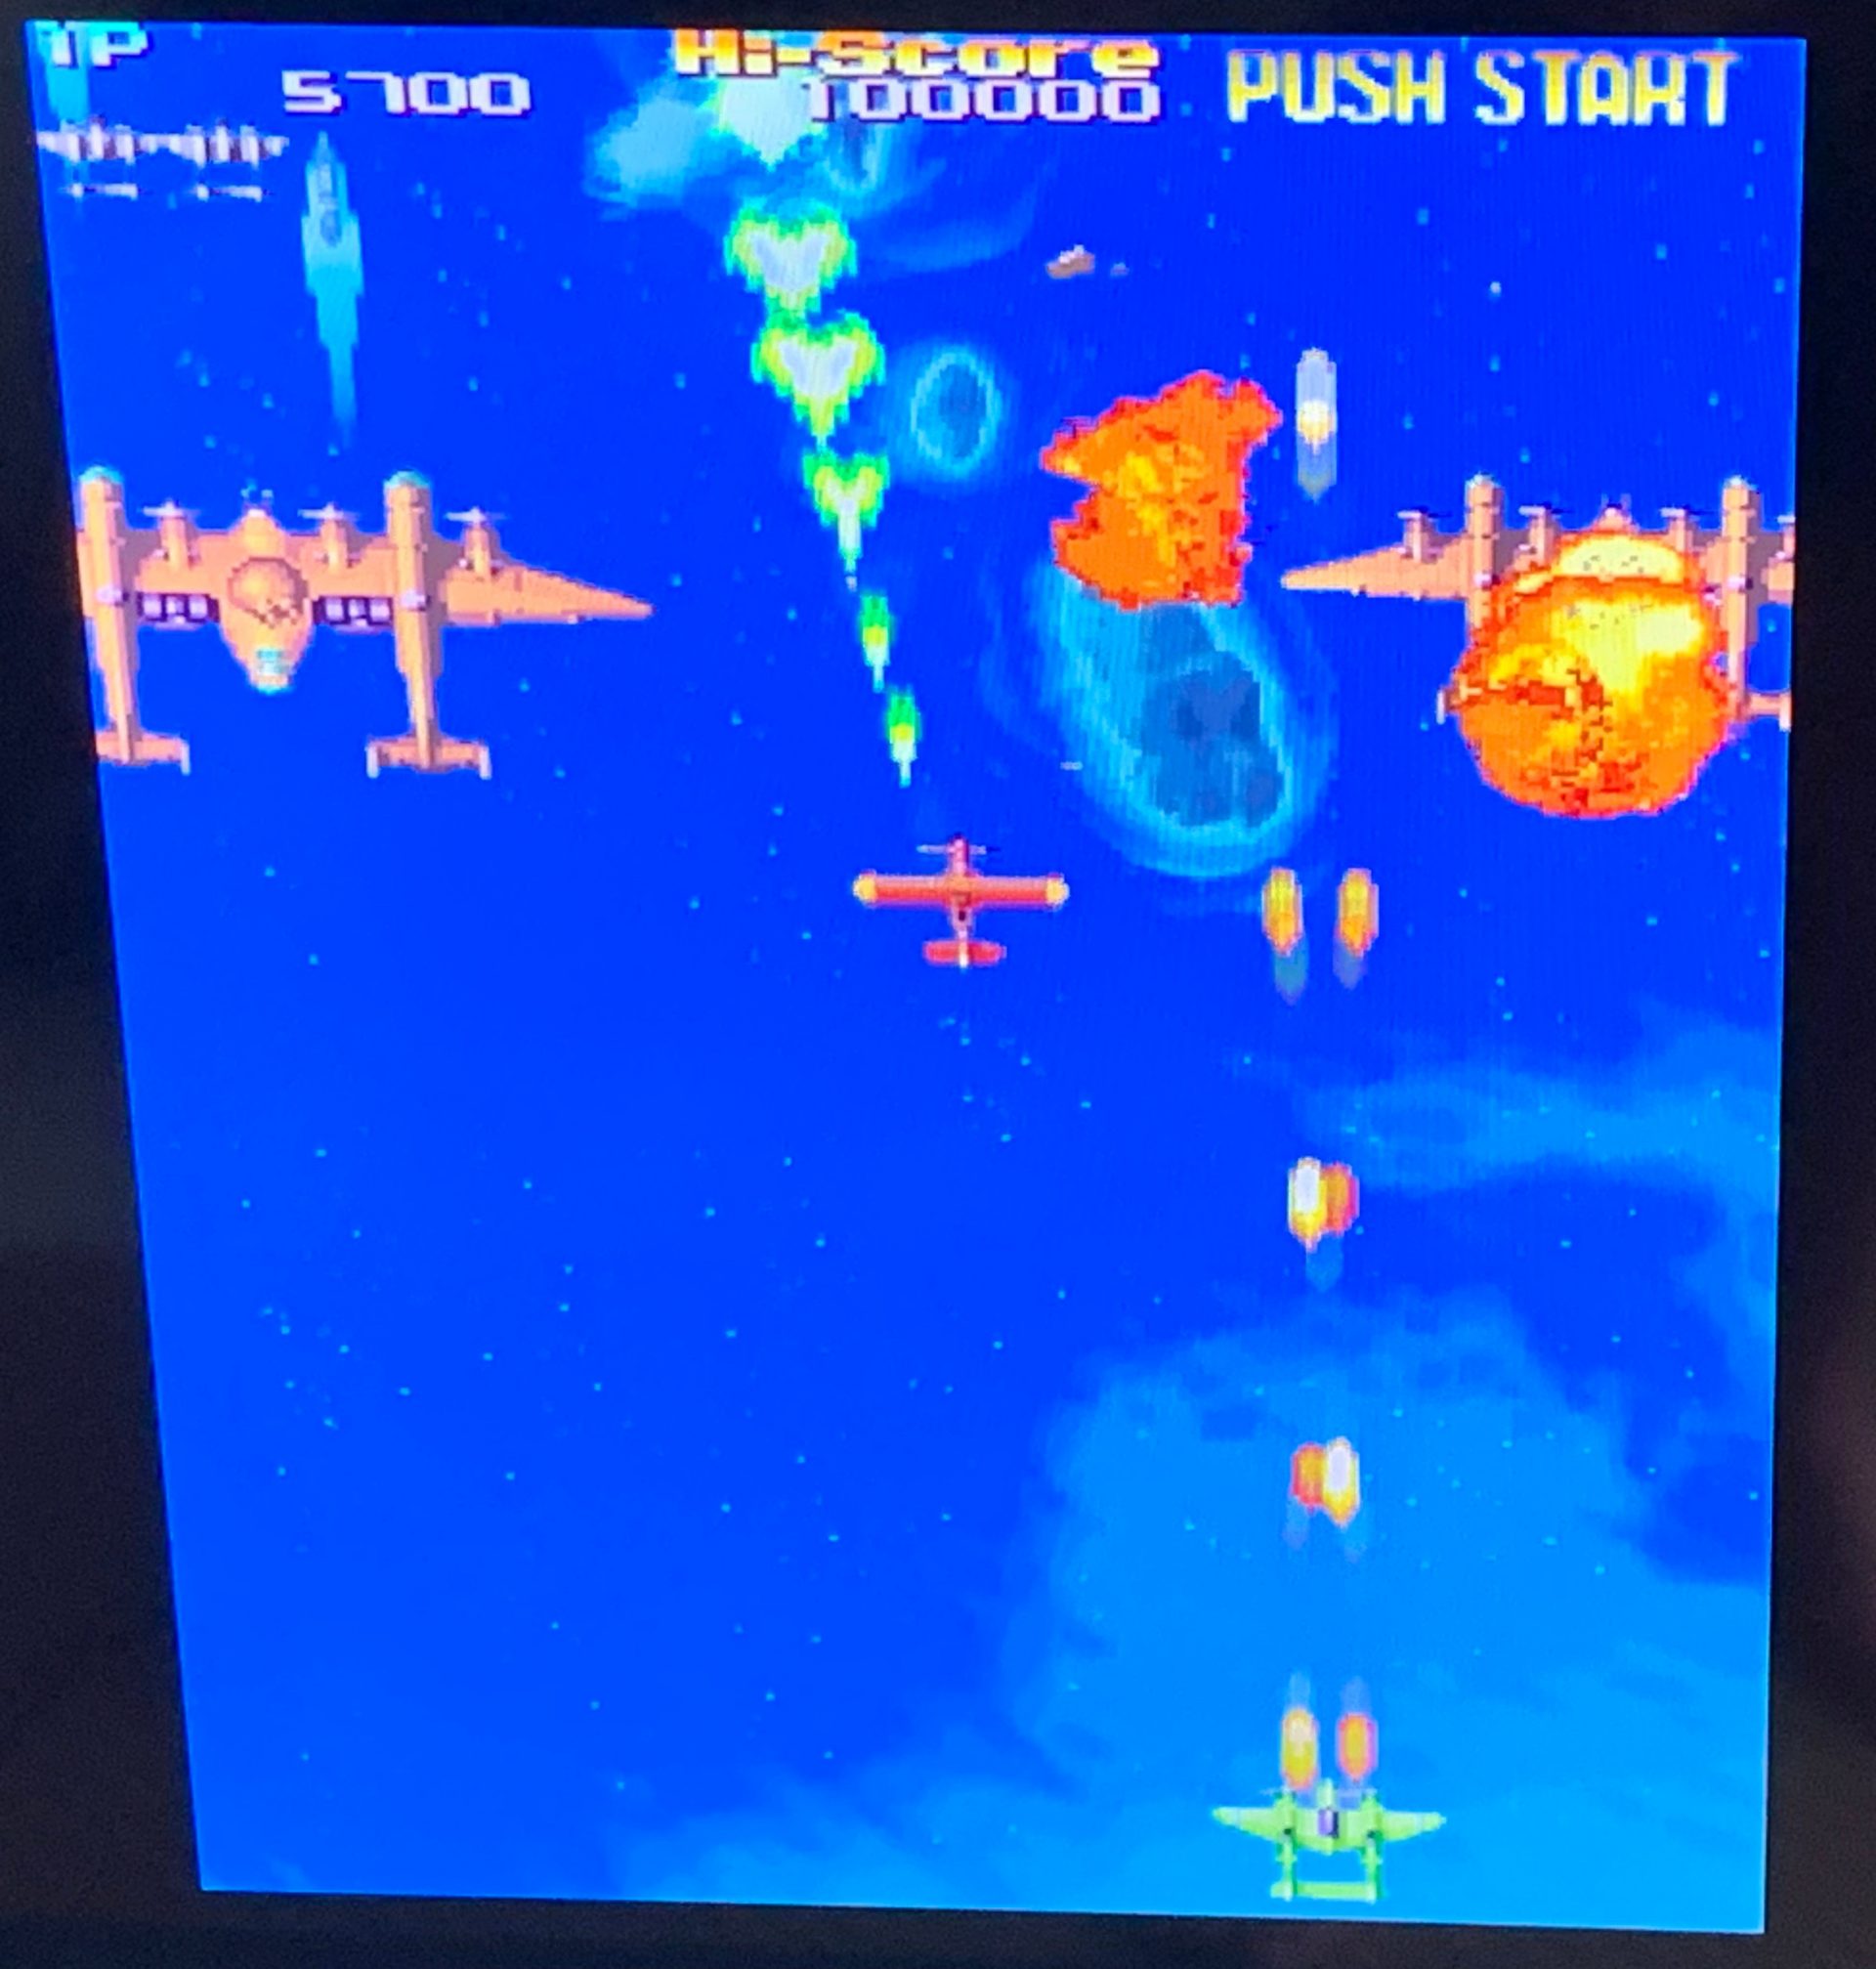
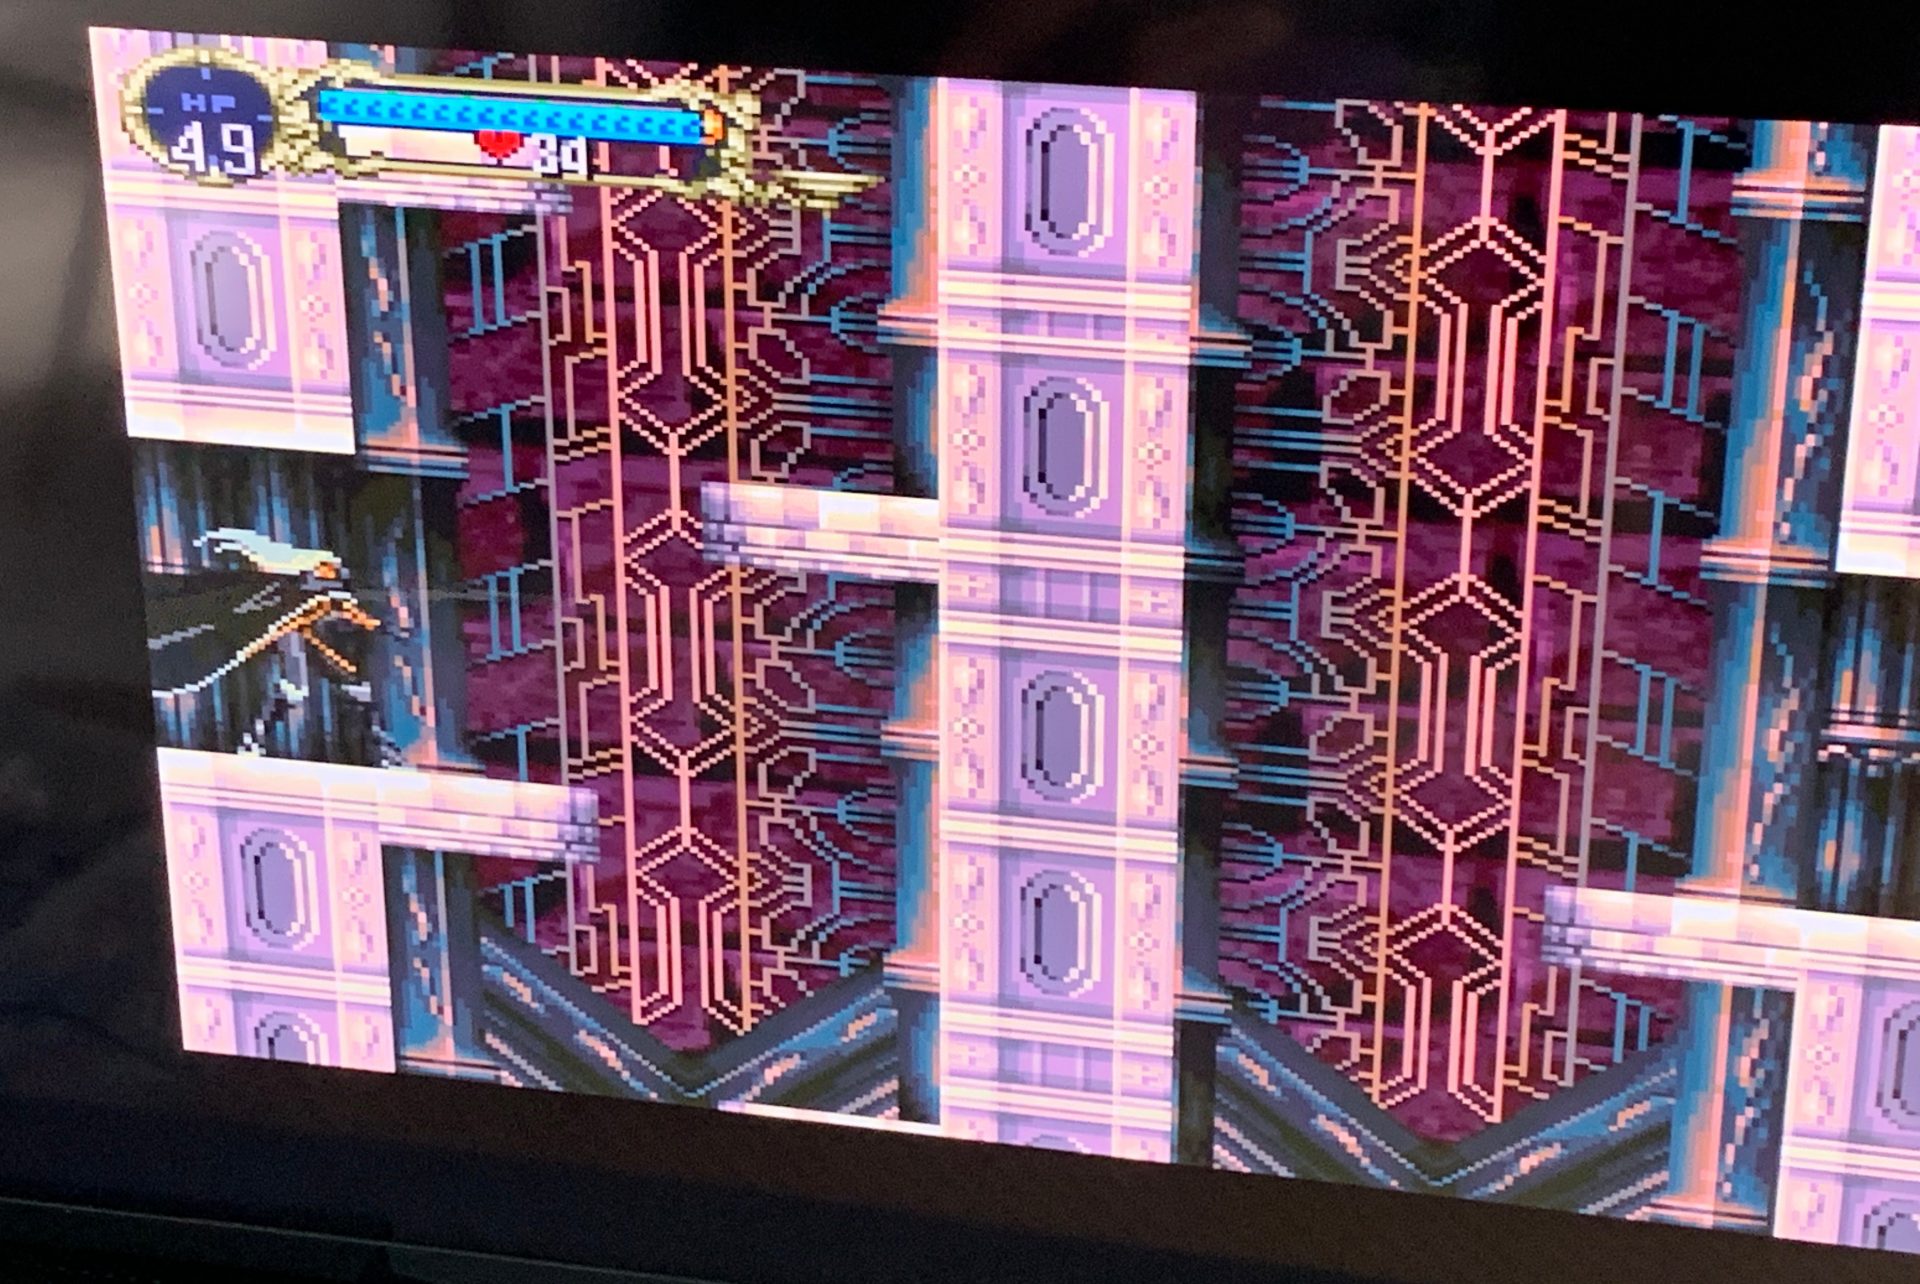
Here you are, you can now enjoy SNES hidden gems like The Firemen, arcade classics like 1943 or Playstation hits like Castlevania Symphony of the Night… all on one Linux powered device.


